Make CD Boot Menu
1)Click "Open", a "Open
Menu File" dialog will pop-up. Select file and click "Open".
(Note: The setup program automatically created a sample
file named 'cdmenu.ezb', you can create your boot menu based on it in
convenience)
2) Click ôNewö to create a new boot menu file.
1)
Screen Layout: color areas on screen used as boot menu background,
Parameters include Upper Left /Lower Right Coordinate and
Background/Foreground colors. You can get 3D effect by tune 'edge' width and 3 color attribute.

2) Text: Text strings displayed on screen layout
or menu bar, Parameters include Upper Left/Lower Right coordinate ,Text String, Color
and Alignment style.

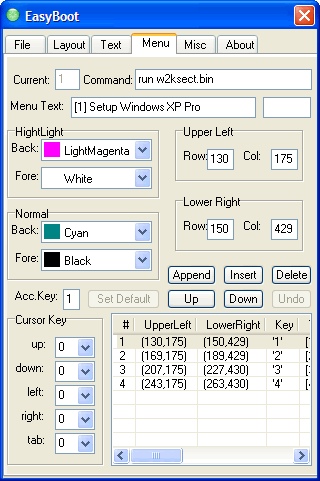
3) Menu Bar: Highlighted bar on screen to
indicate selectable boot menu item. There is a corresponded command with each
menu bar. Parameters include Upper Left/Lower Right coordinates and
Background/Foreground color. Other attributes as following:
*Command to run: can
be divided to two catalog
a) run -- load boot image file, to
boot DOS/98/NT/2000/XP
Example: run dos98.img
run w2ksect.bin
b) boot -- to boot from disk
boot 80 boot
from first hard disk
boot 0
boot from first floppy
reboot
reboot your computer
(Note: if you want one menu to
execute multiple command, simply separate them with a ";".
for example:
cd
/; run cdmenu.ezb)
*Accelerate Key: Key defined for select or directly execute menu
command. Accelerate Key can be 0-9/a-z/A-Z.
*Set as default: set current menu bar as the default highlight one
when boot screen appears.
*Cursor Key: when select a menu item, use up, down, left, right, tab
key to move to next item. there are three conditions:
a) 00 -- default, up, left to select previous item, down, right, tab
to select next item.
b) 99 -- disable, ignore cursor key press
c) 01-36 -- directly jump to given menu item

Set background
color and foreground color the the same value to realize 'transparent text'
effect. In other word, text use Highlight color for active menu bar and Normal
color for inactive menu bar, no background displayed because it is same as foreground.
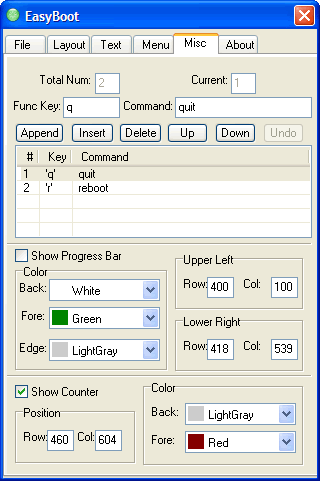
4) Function Key: run command according to
pressed key without visual appearance.
Parameters include Function Key
and command.
Press the key and directly run command after boot menu appears.

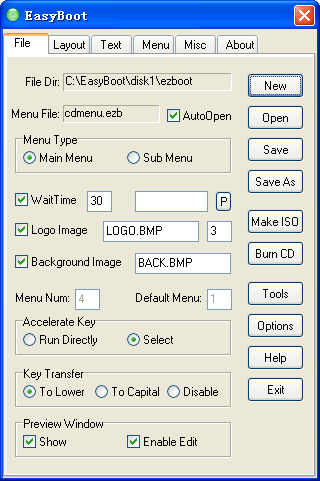
5) Global Parameters
*Main Menu/Sub Menu: main menu file is loaded at CD-ROM boot up, sub
menu is loaded by main menu or other sub menu by "run xxx.bin" command.
*Default Menu Bar: the default highlight displayed menu bar at
boot menu loaded.
*Wait Time: after a boot menu is displayed, if no key pressed
within given number of seconds, the default menu command will be executed
automatically. This feature is very useful for no attendant setup.
*Logo Image: put
logo image file (such as
logo.bmp)
into 'ezboot' directory,
Logo image must be in size of 640x480 with 256 colors, it must be saved as
windows .BMP file, no compression.
*Background
Image: put background image file (such as
back.bmp)
into 'ezboot' directory,
This image must be in size of 640x480 with 256 colors, it must be saved as
windows .BMP file, no compression.
*Accelerate Key mode: you can set "select" or "directly run". If
set "select", after a key pressed, only select the correspondent menu
bar, then press <Enter> or <SpaceBar> to execute.
*Key transfer: can transfer all input key to upper case letter or
lower case letter. You can also disable this function.
*Other: Auto Load last accessed menu file, Preview window
show/edit etc.

Note:
current object is highlighted in Control Panel Window object list; it is
displayed with dashed line in Preview Window at the same time.
1)
Most commonly used function of Control Panel Window includes:
*directly modify value of Upper Left/Lower Right coordinates, Foreground/
Background color and text, command, press <Enter> or Tab
or select another object by mouse click will save modified data automatically.
*click ôAppendö,ôInsertö to create new object, click ôDeleteö
to remove a selected object.
*click ôUpö,ôDownö to change the display order of objects.
*click "Undoö to restore last state. Registered version
support 36 level of undo.
*you can set global parameters such as default menu bar,
wait time .
2) Most commonly used function
of Preview Window includes:
*Left
Mouse Button -- Click on screen object the first time to select it;
Click
selected object (or press SpaceBar) to start move object position;
Click
selected object (or press SpaceBar) the third time to change object size.
*Right Mouse Button -- click to exit edit mode and save the data
modified.
You can press <Enter>
key instead.
*ESC Key -- to cancel all modifies to current selected object and
exit edit mode.
*Tab Key-- select next object.
*Delete Key-- delete the selected object.
*BackSpace Key -- Undo, mostly 36 steps.
*Cursor Key -- press Left, Right, Up, Down can move object
press PageUp, PageDown, Home, End can change object order.
Click "Save", will save the boot menu file, and generate boot loader
automatically.
Copyright (c)2002-2004 EZB Systems, Inc.
Home Page:
http://www.ezbsystems.com
Support: support@ezbsystems.com


